Project Settings
Project Settings currently includes
General,AWS Connection,Team Members, andNotification.This document covers the AWS Connection feature only.
Project Settings is organized into the following areas:
- General – Manage basic project information
- AWS Connection – Configure AWS account integration
- Team Members – Manage project users
- Notification – Configure notifications
This document focuses on the AWS Connection setup process.
1. AWS Connection Overview
AWS Connection is the process of securely linking your AWS account to the RMF service.
- The connection must be complete before Asset Synchronization can expand its scan scope using Resource Explorer.
- The integration process does not require you to directly share AWS credentials (Access Key / Secret).
2. Prerequisite: Enable Resource Explorer
Before proceeding with AWS Connection, you must first enable Resource Explorer in your AWS account.
Resource Explorer is an AWS service that allows unified cross-region search of resources within your account. Security Hero RMF relies on this service to discover assets, so synchronization will not work properly if it is not enabled.
How to Enable
- Sign in to the AWS Console.
- Navigate to the Resource Explorer service.
- If Resource Explorer is not yet enabled, click the Turn on Resource Explorer button.
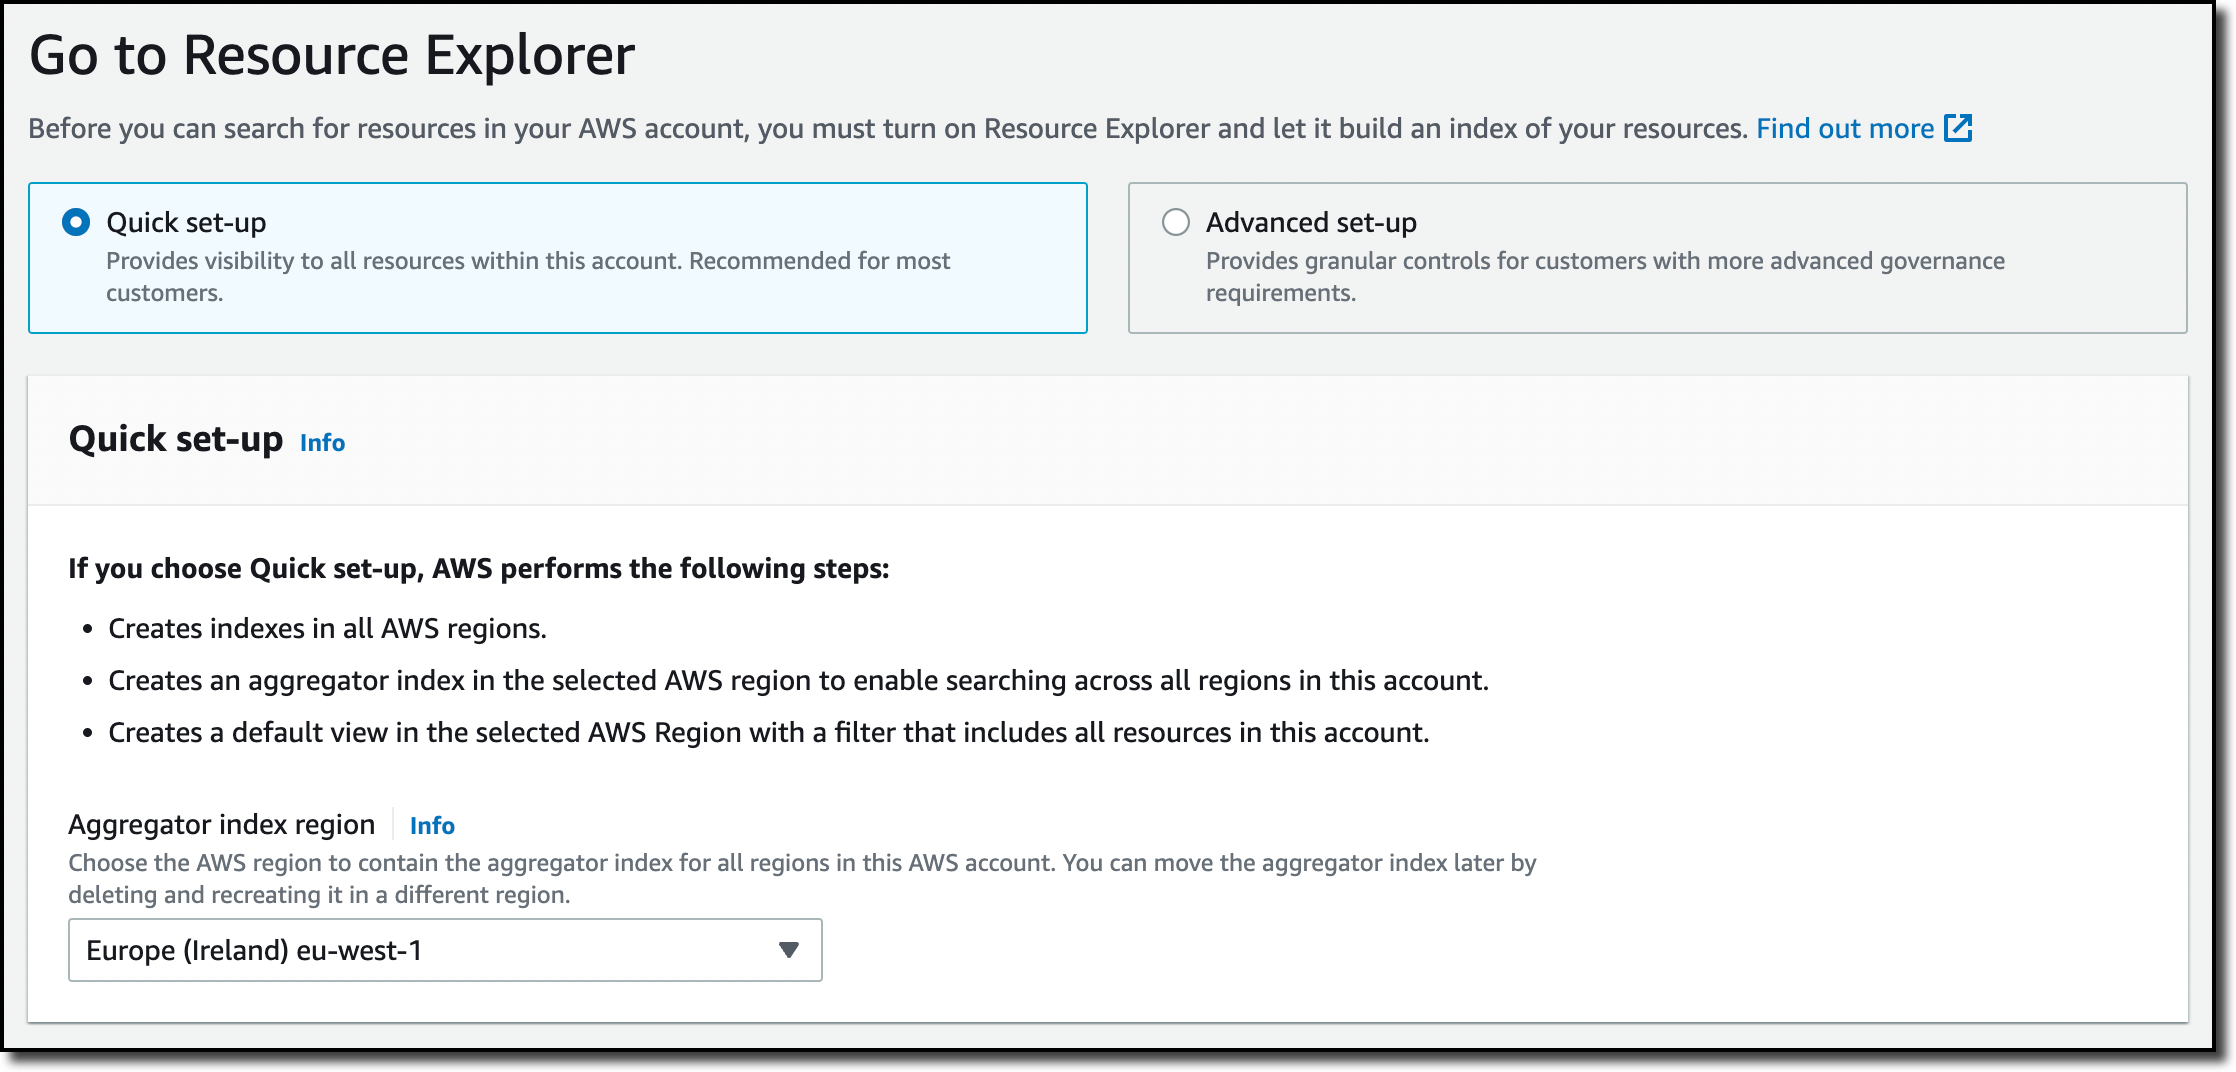
- Select Quick setup or your preferred option and complete the activation.
- Note the region where the Aggregator index is created (typically the current region).
It may take several minutes for indexing to complete after enabling Resource Explorer. Some resources may not appear in search results immediately, so wait a moment before proceeding with AWS Connection.
For more details, refer to the AWS Resource Explorer official blog post.
3. Connection Process (3 Steps)
3.1. Enter Your AWS Account ID
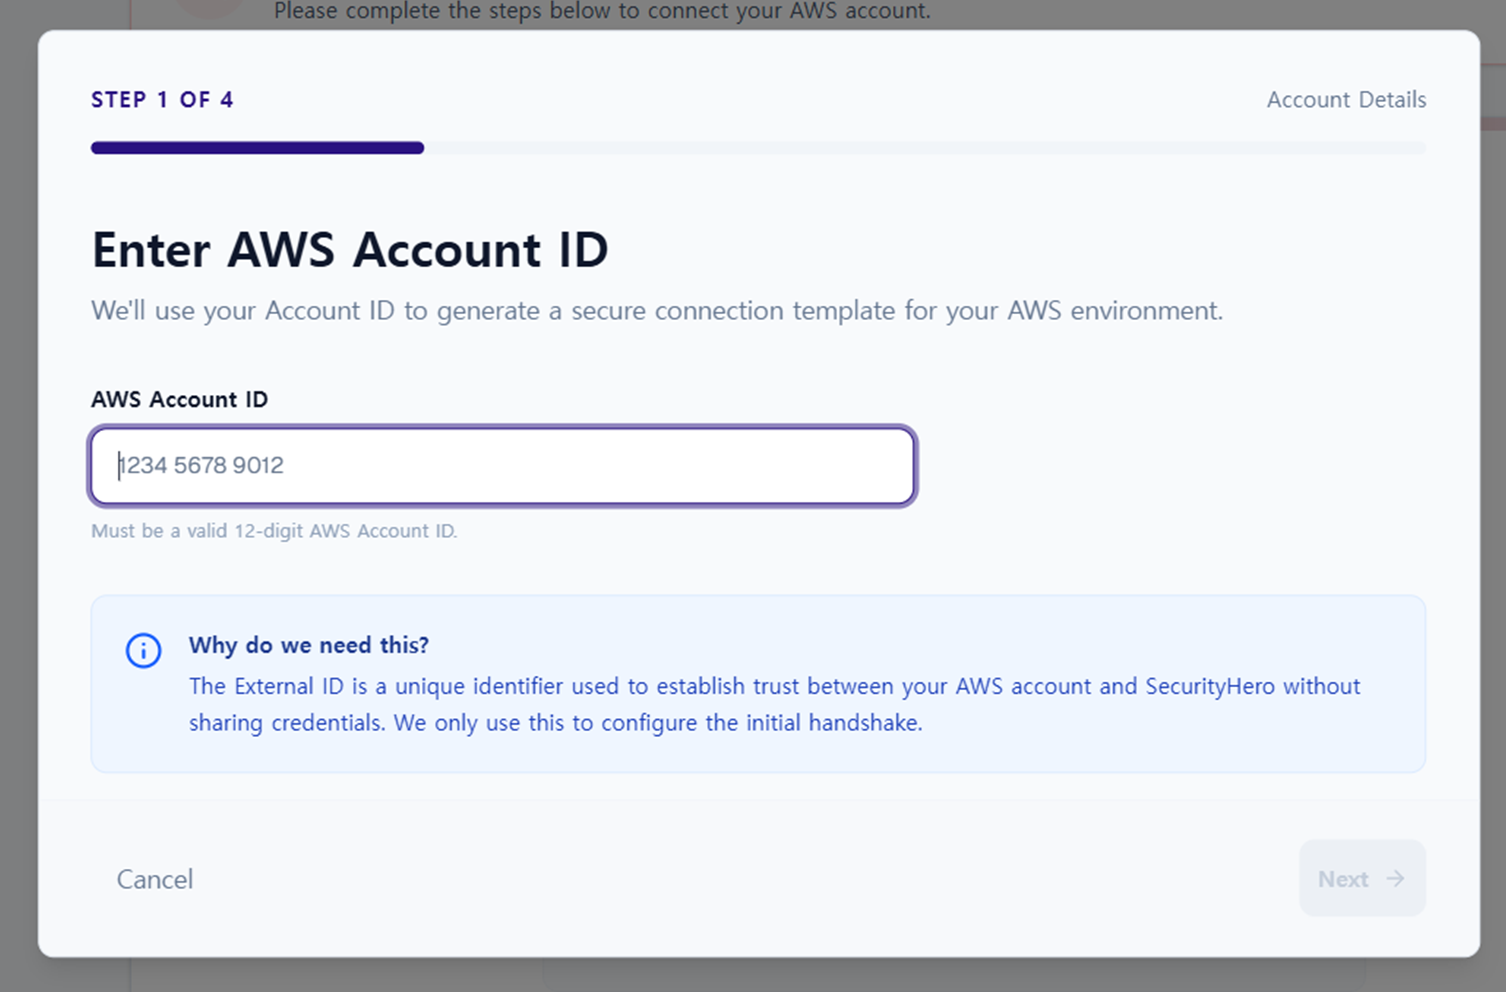
Enter your AWS Account ID.
- The Account ID is used to identify your AWS account and confirm the integration target.
- The goal is to connect your account to Security Hero RMF without sharing credentials.
3.2. Create a CloudFormation Stack
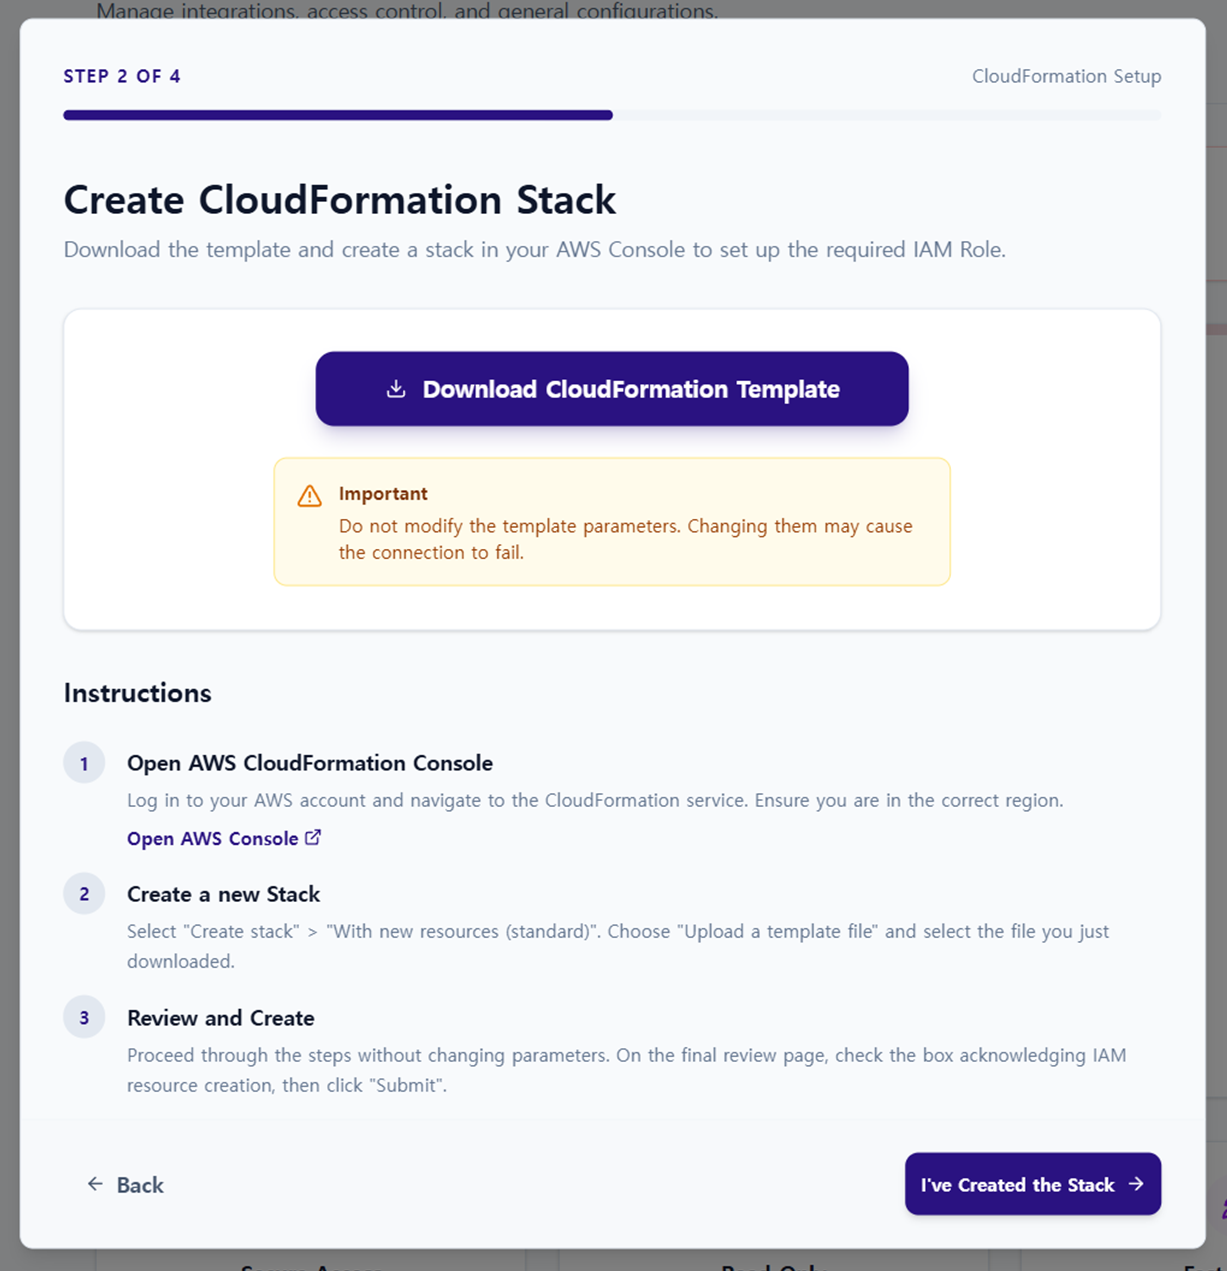
After entering your Account ID, create the integration IAM Role in your AWS Console.
- Use the CloudFormation template provided by the service to create the stack
- The stack creation process sets up the IAM Role and permissions required for RMF integration
- This standardizes the integration process and reduces the chance of missing configurations compared to manual setup
3.3. Verify Connection Status
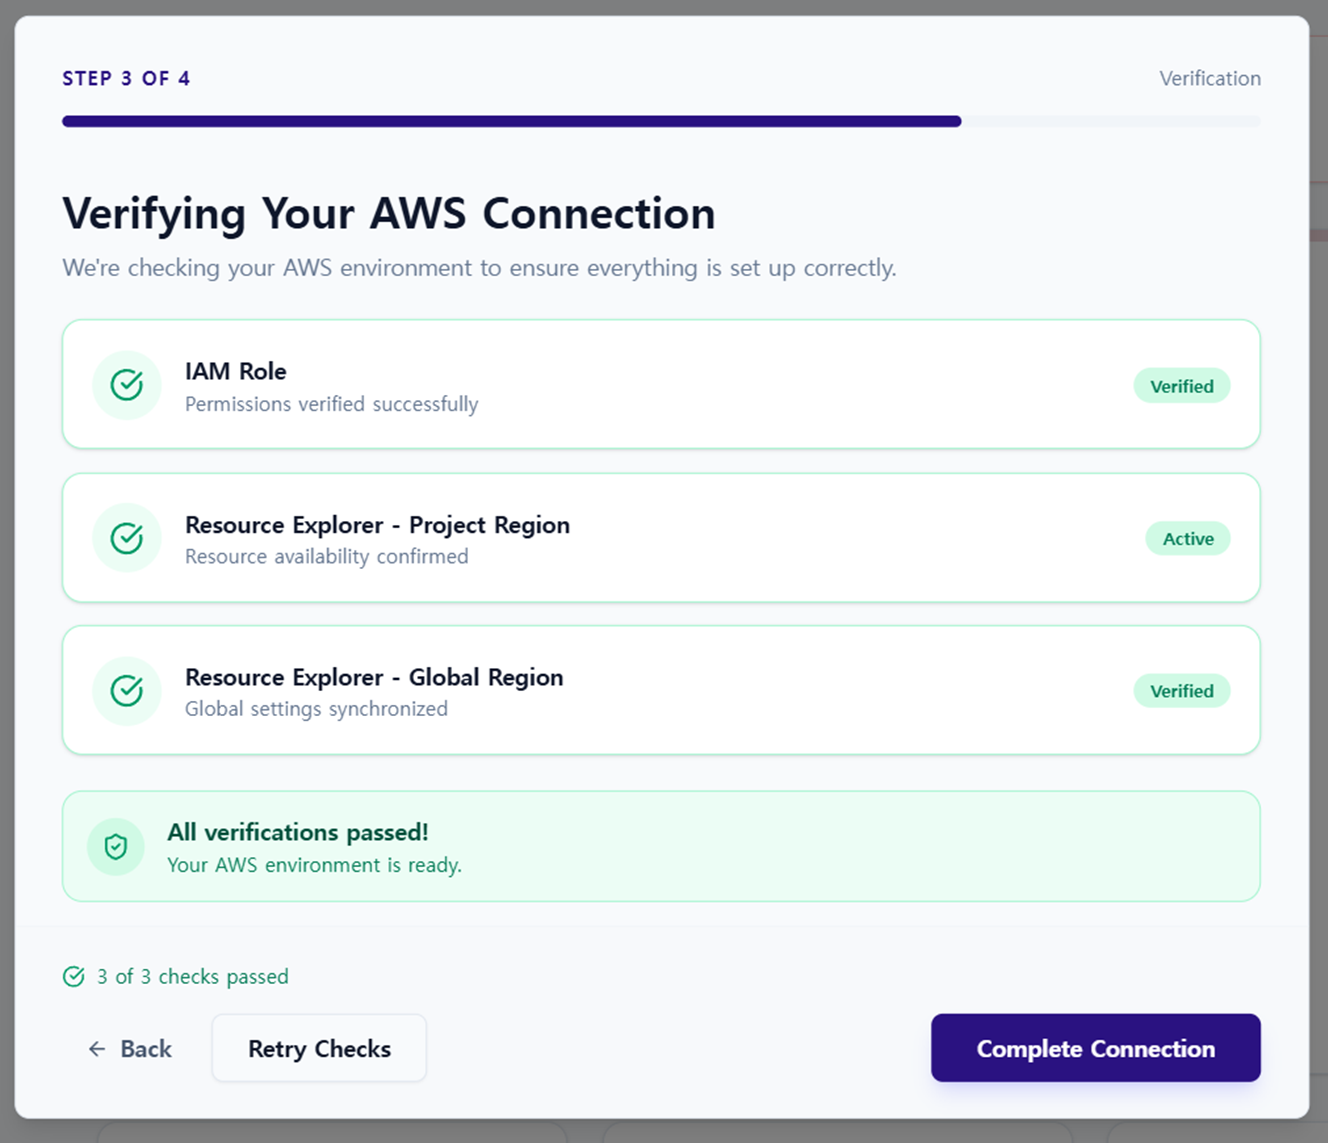
Once the stack is successfully created, the connection between your AWS account and the RMF service is complete.
- A successful connection enables expanded asset scanning in future synchronization jobs
- Connection status can be verified on the AWS Connection screen
4. Operational Tips
- After connecting, adjust Sync Scope to selectively scan only the services and resources you need
- When modifying the CloudFormation Stack, always check whether the changes affect IAM Role permissions